
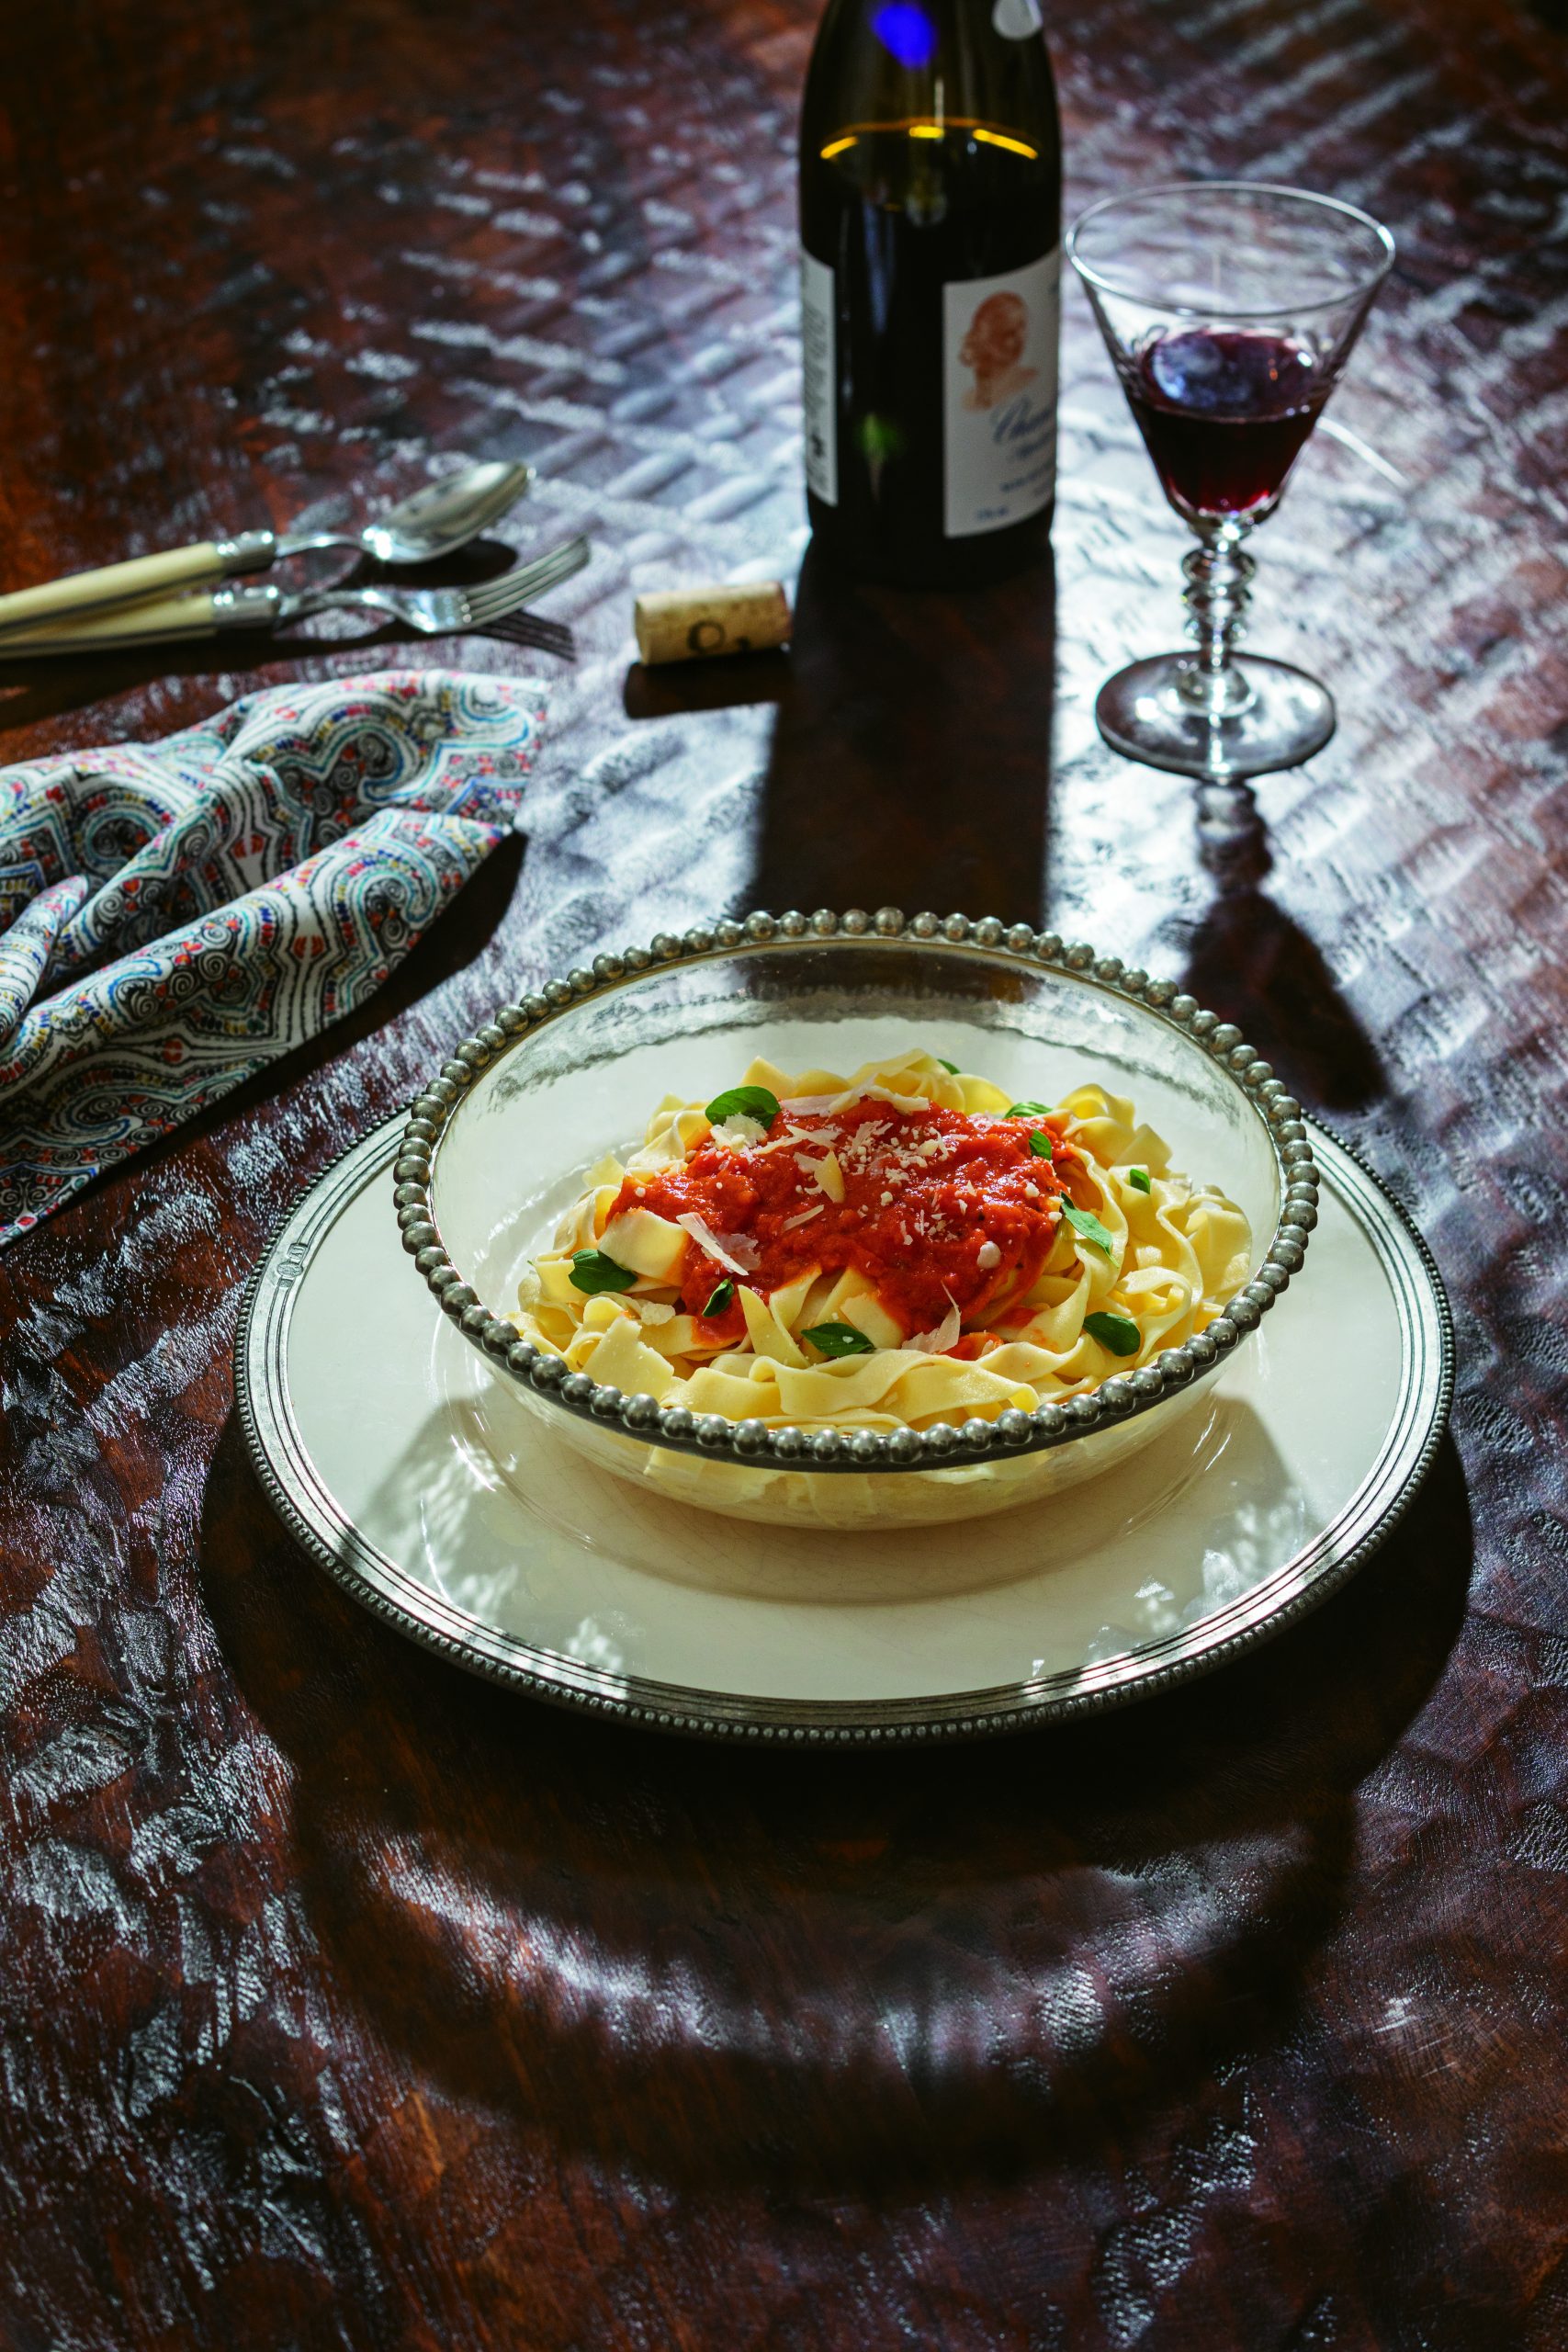
Nothing quite compares with the exceptional taste and texture of fresh pasta. Simple ingredients of flour and eggs, combined and cut by hand, infuse a love and sense of pride to produce a rich and satisfying meal. Juliska napkin courtesy of Cottage & Vine.
In addition to the freshness and flavor that comes with making a dish from scratch, there is also an undeniable sense of pride. Taking only flour and water and transforming them into a warm plate of pasta elicits a humble satisfaction. While some chefs dedicate their careers to that achievement, home cooks can also make their own pasta. The simple ingredients and centuries’ worth of varying techniques make fresh, homemade pasta a surprisingly approachable dish.
Noodles hold a center roll in both Asian and Italian cuisines. The first noodles were believed to come from China, where chefs would cut bread dough into small pieces and boil it. Since that time, noodles have been worked into recipes around the world and have taken on different shapes, textures, and flavors. Currently, of course, dried noodles and pasta are most easily found in grocery stores. A quick 10 minutes in salted boiling water is all it takes to serve a bowl of the packaged version. While the simplicity of that certainly has value, homemade pasta provides an unparalleled freshness in both flavor and texture.


Tools and Methods
Because this is a food that existed long before modern cooking technology, the tools range from incredibly simple to electric and efficient. At the most basic level, making pasta at home requires only the pasta dough and an experienced set of hands. On the other end of the spectrum, electric dough laminators and pasta machines quickly produce uniform shapes of fresh pasta.
When exploring pasta-making tools, drying racks for noodles are a common item for sale. While homemade noodles can certainly be dried for use later on, this process removes an aspect of freshness from the pasta, and some recipes that include raw eggs are best cooked quickly. Fresh, homemade pasta is best cooked soon after it is shaped. It can, however, be dusted with flour and kept in a refrigerator for up to two days.
Essential Ingredients
Pasta dough, like most dough, is made up of a flour and liquid mixture. Different flours provide unique textures and flavor to the finished product, and the liquid used can either add richness or work as a base to let other flavors in the pasta dish shine.
Buckwheat flour is necessary to make the Japanese soba noodle. Because buckwheat has no gluten, this type of noodle is difficult to make at home. The dough breaks down easily and cannot be repaired like dough with gluten. Most dried soba noodles in grocery stores are made with just enough all-purpose flour to help them stay together.
Some Asian noodles, like vermicelli, are made with rice flour, which makes the noodles light and tender.
When making noodles at home, wheat flour is the easiest and most readily available with which to work. From this base, home cooks can make udon and ramen noodles, dive into Italian cuisine with long strands of fettuccini, or get playful with other shapes.
The liquids used to create the dough are typically water or eggs. Using water highlights the flavor profile of the flour and lets other ingredients in the pasta dish rise to the forefront. Water is typically used in Asian noodles like udon, vermicelli, and soba, and in the Italian semolina pasta.
Eggs, on the other hand, provide fat and protein to pasta. Egg noodles, common in Northern Italy, are easily achievable in a home kitchen because of their strength.
The recipes and instructions below are all made with an egg noodle. Because of the dough strength and the commonality of ingredients, the at-home pasta maker should begin with this dough. Plus, this one dough can take on many different shapes to create unique pasta dishes.


Homemade Egg Noodles
1 cup of 00 flour, plus more for dusting
1 teaspoon salt
1 egg
2 egg yolks
On a clean countertop, use a sieve to shake the lumps from the flour. The flour should fall into a nice mound onto the countertop. Create a well in the middle of the flour mound. The well should be large enough to fit the eggs. Add the egg, egg yolks, and salt to the well. Use a fork to whisk the eggs inside of the well. Slowly begin to pull flour into the eggs. Once a shaggy dough starts to form, dust the countertop with a bit more flour and begin kneading the dough. Knead the dough for about 5 minutes. It should be well-mixed and elastic. Wrap the dough in plastic wrap and set aside at room temperature for 30 minutes to 4 hours. The plastic wrap will keep the dough moist and prevent a tough skin from forming on the outside.
Once the dough has had time to rest, unwrap and knead for 5 more minutes. Cut into four pieces. If using a pasta laminator, shape the dough into a flattened square, dust with a bit of flour to prevent sticking, and feed it into the machine on the widest setting. Continue to roll the dough through the pasta machine, gradually moving to thinner settings until the dough is the desired thickness. Whenever the dough appears to be a bit sticky or tacky, dust with flour.
Once the dough has reached preferred thickness, continue the process of cutting the dough into your preferred shape. For linguini, many pasta laminators come with an attachment for cutting uniform noodles. Simply run the sheet of pasta through the machine and dust with flour. Without a pasta machine, creating linguini is still fairly simple. Take the sheet of pasta, dust both sides with flour to prevent sticking and fold over four times. With a sharp knife, cut the noodles into long strips. Lift the strands to separate. To cook, put the noodles into a heavily salted pot of boiling water. Fresh noodles take less time to cook, so don’t leave the stove. Once the noodles are in the pot, stir to keep them from sticking to one another. After about 3 minutes, pull out one noodle to taste. They should be cooked to al dente at this point. Strain out the pasta water, and run the noodles under cold water to prevent further cooking.
Butternut Mushroom Filling
1 cup pureed butternut squash
1 cup ricotta cheese
1/2 cup mushrooms, diced
Salt, to taste
Pepper, to taste
1 teaspoon dried oregano
1/2 teaspoon garlic powder
1/4 teaspoon onion powder
For stuffed pasta, it is important that the filling be creamy but thick enough to hold up when boiled. Saute the diced mushrooms over medium heat with the salt and pepper. When they are browned, but not crispy, drain the oil and excess moisture. Stir the squash, cheese, and mushrooms together with the remaining spices. Refrigerate this mixture until ready to create stuffed pasta.
Here in America, ravioli is probably the best known stuffed pasta, but there are many more options and fun folding techniques that may take a bit longer to master.
To make ravioli, run two quarters of the egg pasta through a pasta laminator, pressing the dough into the thinnest setting. Lay the two sheets out on a floured countertop. While a spoon will work for placing the filling, a piping bag adds an extra level of precision. On one sheet pipe out the filling to about the size of a quarter. Do this across the sheet of pasta, leaving about 1 inch in between. Place the second sheet of pasta over the first, being sure to line them up. Using a hand, press down firmly around each bit of filling, helping the two sides of the ravioli to join together. (Don’t push down where there is filling.) Use a knife to cut in between the pieces of ravioli. They should hold together, but if they start to come apart, use a fork to crimp the edges.
To cook, put the ravioli in salted, boiling water for 4 minutes. Pull out one piece to ensure that the filling is warm and then strain off the rest of the water.
Shapes
While various shapes add a playfulness to pasta dishes, they also serve a purpose. Curls in the pasta add texture and hold onto sauce, ultimately creating a cohesive dish. A number of simple tools can be purchased to help make different shapes, ridges, and lines in pasta. Even without the various tools used to make these shapes, several everyday items in the kitchen can create a similar design. A fork is a great way to add ridges to malloreddus, while a dough cutter held at just the right angle creates the curled trofie.
Bow Tie (aka Farfalle)
While this shape is commonly referred to as “bow tie” pasta in America, the Italian name translates to butterfly. After laminating the pasta as thinly as possible, cut the dough into 1-inch by 1/2-inch rectangles. Interestingly, if the pasta has a fluted edge, it is called farfalle, but with a flat edge it is strichetti. Take the rectangles and begin to fold the pasta in half along the long edge, pinching in the middle. Before folding entirely in half, fold the edges back the other way to achieve a kind of accordian shape in the middle with the edges fanning out. This will create the bowtie shape.
Trofie
For this shape the laminator is not needed. Using the palms of your hands, roll the dough into a long strip about 1/4-inch thick. Using a bench knife, cut the strip into 1-inch long pieces. Take each piece and individually drag the bench knife over the dough at a 30-degree angle so that the dough creates a short spiral. This may take some practice, but the fun spiral shape is great for picking up sauces.
Malloreddus
Again, for this shape the laminator is not needed. Roll the dough with hands to create a long snake-like strip. Use a knife to cut the dough into small nuggets, about the size of a dime. Traditionally, Italians will use a ridged wooden board or paddle to make this shape. The same texture can be made with a fork. Take a nugget of dough and lightly press it between the thumb and the board or fork, dragging it along so that the dough curls and ridges form along the outside. Repeat until all of the dough is in this shape.